// Enable for Java Compiler on src/main/java
compileJava {
    options.compilerArgs += ["--enable-preview"]
}

// Enable for Java Compiler on src/test/java
compileTestJava {
    options.compilerArgs += ["--enable-preview"]
}

// Enable for running tests
test {
    jvmArgs '--enable-preview'
}

// Enable for Quarkus DevMode runner which was my main use-case
quarkusDev {
    jvmArgs '--enable-preview'
}Using JDK Preview Features from a Gradle-based Eclipse-project
01 March 2020
This post is about working with preview features of Java (e.g. JDK 13’s switch expressions preview) from your Gradle project within Eclipse IDE with zero manual configuration. On top of that, my project uses Quarkus which only makes a minimal difference as we have to consider the dev-mode as well.
If you are working with javac and java on the command-line only, it is very simple in general: You have to pass --enable-preview as an argument to javac and java.
In your build.gradle file you can do it like this:
If you use preview features in your source-code, running a gradlew build on the commandline should now compile your code.
You can run the built JAR with java --enable-preview -jar app.jar.
In case you want to run your application from Gradle, you will have to configure the JVM args for this as well in your build.gradle; See the JavaExec task.
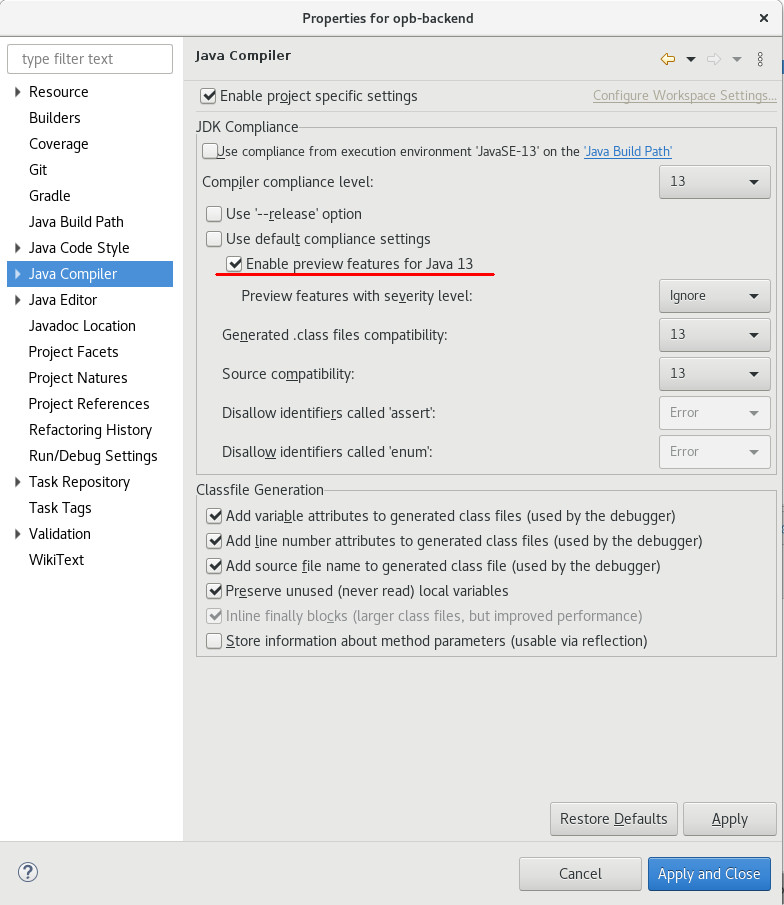
Unfortunately, Eclipse will not automatically infer the right settings for the Eclipse compiler and will show compile errors in your IDE. The quick fix is to manually enable the preview feature in the Java Compiler project-settings (right-click on the project; Properties > Java Compiler; check 'Enable preview features for Java 13'), but I would prefer that there are no manual steps needed. I.e. a team member should be able to clone a Git repo, import it into Eclipse and all should be set up automatically.
On our way of achieving this, you first have to add this to our build.gradle:
// Add plugin at top of your build.gradle
apply plugin: 'eclipse'

// ...

//Buildship doesn't use that hooks (https://discuss.gradle.org/t/when-does-buildship-eclipse-customization-run/20781/2)
//you need to run `gradle eclipseJdt` separately
eclipse.jdt.file.withProperties { props ->
    props['org.eclipse.jdt.core.compiler.problem.enablePreviewFeatures']= 'enabled'
    props['org.eclipse.jdt.core.compiler.problem.reportPreviewFeatures']= 'ignore'
}
It found it in this Eclipse JDT Github issue.
When you now run the Gradle-task eclipseJdt you can do a Refresh of your Gradle project in Eclipse afterwards and you should see that the Java Compiler settings in Eclipse also have been properly set.
The ultimate goal is that we don’t have to run this gradle-task manually. To achieve this, we can leverage another quiet new Buildship feature that triggers a gradle task whenever a project is imported into Eclipse or the project is refreshed. You can read about it here.
eclipse {
    synchronizationTasks eclipseJdt
}
This is the last missing piece. Once you import the project into Eclipse, this task will automatically trigger and configure the Eclipse compiler. No manual steps or instructions you have to give to your team mates how to get the project imported properly.
I was expecting this task to also be triggered when you run "Refresh Gradle Project" for an already imported project, but this did not work for me yet. Instead, I had to delete the project from Eclipse and import it again. I still have to find out why.